Making Particle Systems Pretty
CS 493/693 Lecture, Dr. Lawlor
First off, OpenGL draws GL_POINTs as ugly square boxes by default. You can make your points at least look round with:
glEnable(GL_POINT_SMOOTH);
Second, points are a fixed size, specified in pixels with:
glPointSize(pixelsAcross);
This is pretty silly, because in 3D the number of pixels covered by an
object should depend strongly on distance (far away: only a few pixels;
up close: many pixels).
Worse yet, you can't call glPointSize during a glBegin/glEnd geometry
batch. This means even if you did compute the right
distance-dependent point size, you couldn't tell OpenGL about it
without doing a zillion performance-sapping glBegin/glEnd batches.
Luckily, you can compute point sizes right on the graphics card pretty darn easily, like this:
	/* Make gl_PointSize work from GLSL */
        glEnable(GL_VERTEX_PROGRAM_POINT_SIZE);

	static GLhandleARB simplePoint=makeProgramObject(
	"void main(void) { /* vertex shader: project vertices onscreen */\n"
	"	gl_Position = gl_ModelViewProjectionMatrix * gl_Vertex;\n"
	"	gl_PointSize = 3.0/gl_Position.w;\n"
	"}\n"
	,
	"void main(void) { /* fragment shader: find pixel colors */\n"
	"	gl_FragColor = vec4(1,1,0,1); /* silly yellow */ \n"
	"}\n"
	);
	glUseProgramObjectARB(simplePoint); /* points will now draw as above */
(This uses my ogl/glsl.h functions to compile the GLSL code using OpenGL calls.)
This scales points by a hardcoded constant, here 3.0, divided by the
"W" coordinate in the projection matrix. Because we project 3D
points onto the 2D screen by dividing by W, it make sense to divide the
point's size by W as well.
Another more rigorous approach is to figure out the point's apparent
angular size in radians, then scale radians to pixels by multiplying by
the window height (in pixels) and dividing by the window field of view
(in radians). A point of radius r has angular size asin(r/d) when
viewed from a distance d, so:
	float d=length(vec3(gl_Vertex)-camera); // hypotenuse to point
	float angle=asin(r/d); // angular size of point, in radians
	gl_PointSize = angle/fov_rad*glutGet(GLUT_WINDOW_HEIGHT); // ==fraction of screen * screen size
Of course, we need to pass in the camera location via a glUniform, and
similarly compute the conversion factor between radians and pixels in
C++ and pass that into GLSL.
	glUniform3fv(glGetUniformLocation(simplePoint,"camera"),1,camera);
	glUniform1f(glGetUniformLocation(simplePoint,"angle2pixels"),
		glutGet(GLUT_WINDOW_HEIGHT)/fov_rad);
In practice, this GPU point scaling is extremely fast, and looks pretty nice!
Depth Compositing Order
One unfortunate consequence of classic alpha blended transparency, like
we set up at the edges of our objects, is rendering order
dependence. This causes ugly artifacts at the boundaries of
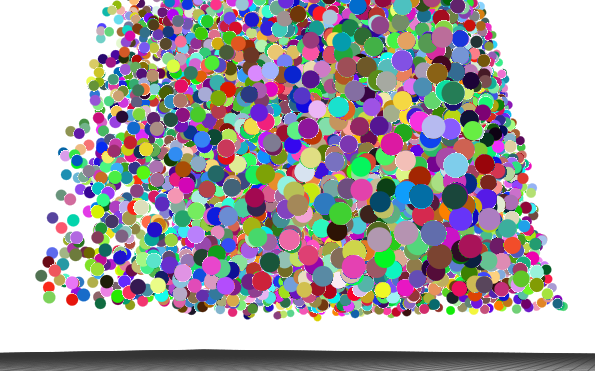
objects that get drawn before the objects behind them--note how some
spheres have a crusty white border, while others have a smooth blended
edge.

The problem is a well-known interaction between alpha blending and the
depth buffer (Z buffer): if you draw a transparent object with Z writes
enabled, nothing behind it will ever get drawn. But if you turn
off Z writes, sadly,stuff "behind" it will get drawn on top!
Classic alpha blending only works if we draw things back-to-front anyway (farthest away first):
new color = source color * source alpha + destination color * (1.0 - source alpha)
There are several solutions to this.
- Some folks do two rendering passes: the first pass with depth
writes enabled, but only drawing non-transparent geometry (for example,
using the alpha test against 0.99); then a second pass with depth
writes disabled, to fill in the transparent edges.
- A better looking solution, especially when you have large
transparent areas, is to sort particles back-to-front before
rendering. If we draw the farthest-away particles first, then
closer and closer, our compositing works correctly.
class particle_depth {
public:
    float depth;
    int index;
};
inline bool farther(const particle_depth &a,const particle_depth &b) { // for sorting
	return a.depth>b.depth;
}

	/* Depth-sort points before drawing */
	std::vector<particle_depth> depths(particles.size());
	for (unsigned int i=0;i<particles.size();i++) {
		depths[i].depth=length(particles[i].pos-camera);
		depths[i].index=i;
	}

	std::sort(depths.begin(),depths.end(),farther);

	glBegin(GL_POINTS);
	for (unsigned int i=0;i<depths.size();i++) {
		int j=depths[i].index;
		glColor3fv(particles[j].color);
		glVertex3fv(particles[j].pos);
	}
	glEnd();
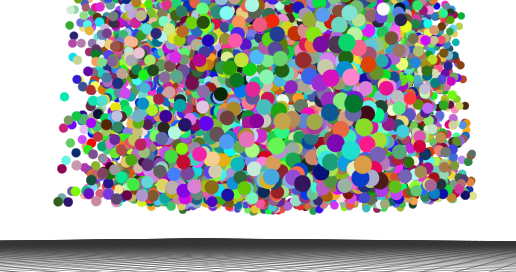
This is faster than you might think (std::sort is pretty fast), and it looks nice:

If your points are transparent, ensuring that the depth order exactly
matches the Z buffer gets even more important. In that case, you
can calculate a depth order that matches OpenGL's "w" coordinate from
the projection matrix:
// Extract the "W" component of this point, when run through this matrix (for sorting)
inline float proj_w(const vec3 &pos,const float *projmatrix)
{
	return pos.x*projmatrix[3]+pos.y*projmatrix[7]+pos.z*projmatrix[11];
}
...
	float projmatrix[16];
	glGetFloatv(GL_PROJECTION_MATRIX,projmatrix);

	/* Depth-sort points before drawing */
	std::vector<particle_depth> depths(particles.size());
	for (unsigned int i=0;i<particles.size();i++) {
		depths[i].depth=proj_w(particles[i].pos,projmatrix);
		depths[i].index=i;
	}
If you have programmable shaders, you could also write gl_FragDepth to
match the camera-to-point distance you calculated before.
Finally, if you're sorting the geometry already, you can even get rid
of the depth writes entirely using glDepthMask(GL_FALSE).
See "particles2_depthsort" for a complete example.
Point Billboards
For fire or explosions, you often want to texture your particles.
One way to do this is to draw little quadrilaterals centered on each
particle (these are also called "billboards"). This is easy to do
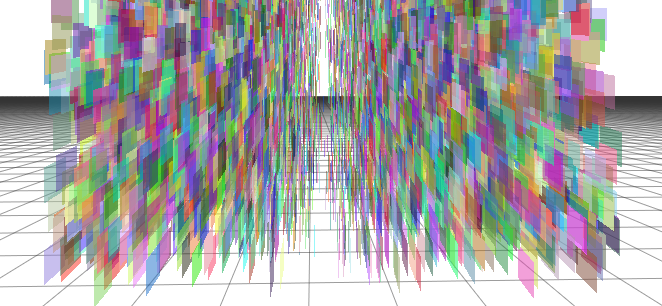
badly, so you can see down the edge of the quad where it has zero
thickness:

Since you always have to make sure your quad faces the camera, the best
way to find the corners of the quad is just to use the camera's current
orientation. I keep this handy in a "camera_orient" class, but
depending on your camera model you may have to rescue those vectors
from the projection matrix.
Here's how I orient my billboards so they always face the camera:
	vec3 corners[4], texcoords[4];
	float size=0.03; // half the size of our little billboard
	vec3 screenx=camera_orient.x*size;  // billboards MUST face the camera!
	vec3 screeny=camera_orient.y*size;
	corners[0]=-1.0*screenx+1.0*screeny; corners[1]=screenx+1.0*screeny;
	corners[3]=-1.0*screenx-1.0*screeny; corners[2]=screenx-1.0*screeny;
	texcoords[0]=vec3(0,1,0); texcoords[1]=vec3(1,1,0);
	texcoords[3]=vec3(0,0,0); texcoords[2]=vec3(1,0,0);

	glBegin(GL_QUADS);
	for (unsigned int i=0;i<p.size();i++) {
		glColor4fv(p[i].color);
		for (int corner=0;corner<4;corner++) {
			glTexCoord2fv(texcoords[corner]);
			glVertex3fv(p[i].pos+corners[corner]);
		}
	}
	glEnd();
Notice that I've got texture coordinates on each corner of the quad, so
all I need is to load a texture and enable texturing to get textured
billboards!
	/* Load up fire texture with SOIL */
	static GLuint texture=SOIL_load_OGL_texture(
		"fire.png",0,0,SOIL_FLAG_MIPMAPS
	);
	glBindTexture(GL_TEXTURE_2D,texture);
	glEnable(GL_TEXTURE_2D);
See the example code "particles3_billboards" for a complete
example. It usually looks a little wierd to have a single texture
at the same orientation for all the particles, so in that example I use
the standard trick of slowly rotating the texture, and flipping half
the particles so they rotate the opposite direction!


